
Racor 500FG Filter Replacement
Transcript from video
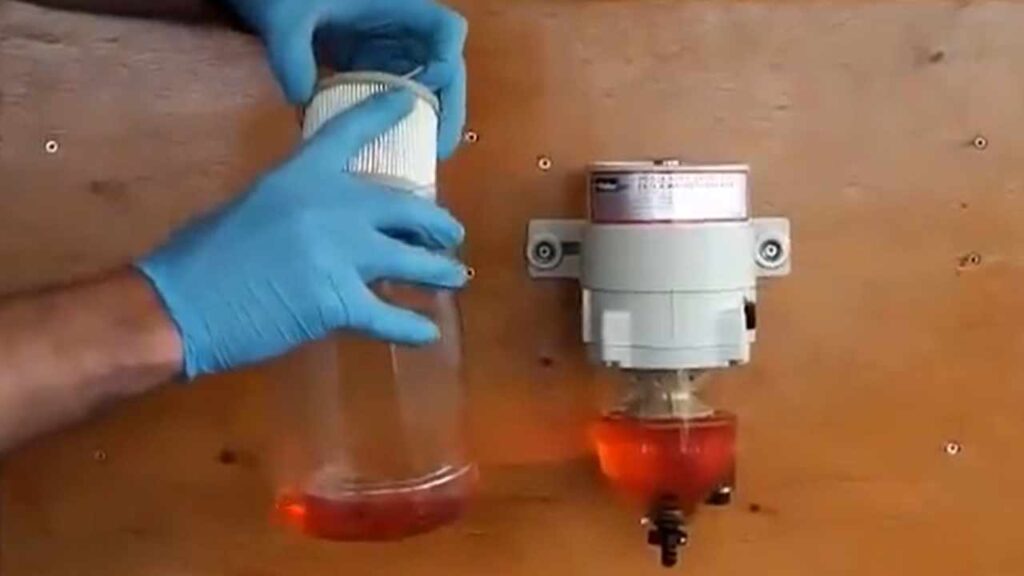
This is changing the Racor 500 fuel filter. It’s probably the simplest of all the fuel filters to change when you’re out in the sea and that is that reason because you only have to remove the lid off the top to be able to change a filter. If you don’t know if your fuel filter is gravity fed so, it’s under fuel pressure from the fuel tank then what you must do is firstly shut your fuel off and it’s always a good precaution to do that anyway so shut your fuel off.
Very simply what you want to do is drain any fuel you have out. This one has a clear bowl on the bottom so you can clearly see there’s any debris in here if there’s any water in here and you can drain it out. What to do to drain quite simply is get yourself a suitable container like this one and then you place it simply underneath and then just start turning the drain plug on it and it should start to drain out now. If it doesn’t drain out and with the fuel tap off sometimes it won’t and what you can do is loosen the T-Bar on top of the fuel filter to introduce some air into the system and it will drain out a lot quicker. Wash any water away or any tempy when you’re happy that all the water and all the debris is out you can shut it back off like so and then you should just be left with nice clean fuel. So then what we need to do is just change the fuel filter, quite simply we just continue turning the T-Bar until it comes completely out and pay attention to the rubber o-ring situated at the top of the tar the lid can sometimes be bit stuck so give it a wiggle and remove the lid again paying attention to the rubber o-ring positioned in the head. Then the fuel filter, situated directly inside normally has two little arms on it that you can pull up sometimes they’re a bit fiddly to grab hold off so I tend to use just a knife just to lift them up like so and then you quite simply pull the fuel filter out and just let it drain until it starts dripping.
You can use your same container to very across and then you can inspect it and all you’re looking to see whether it’s still nice and clean or whether it’s gone very black and these paper fins can get very gunged up indeed and we’re just looking to see to make sure that they’re not all gunged up and that the filter element is relatively clean. You will get some blackening through annual use but they shouldn’t be all clogged up if they’re all clogged up you’ve got contamination in your fuel tank you might have to look that and get that looked at right and quite simply to replace the fuel filter you got your new one there and you just pop it in the top and just push it all the way down into position as far down as it will go like that and what the important stage.
Now you’ve got this new fuel filter in you must then try and fill the fuel filter up to the very top. The fuel Inlet and Outlet are positioned here one side here and Outlet here so what can happen is you can fill the fuel filter up to say this point but what you still have is a large area of air which will not go from this point here so you must fill this fi it all the way up. Otherwise if you imagine the fuel filter’s position like this if you’ve only got the fuel that far up this part of the filter will never get used so in effect you’re using only 50% of the filter so it will clog up twice as quickly so you must fill this as far up as you can. Easiest way to do that is quite simply have a bottle of diesel handy and then you can quite simply just top it up through the top like so until it actually covers the top of the filter and then once that is covered then you can place the lid back on paying attention to replacing the seal that’s the seal there generally you should replace that because you do get a new seal in the packet with the new filter and it will come in with two one for the t-bar and one for the main lid so you get your new seal and pop that back into position and then when you position it back on be careful that it doesn’t drop back out.
Can quite easily fall out as you’re putting it on so if you’re in an awkward space down in the engine bay you need to make sure that that’s going on and once that’s on then you can place your T-Bar in and again this has a small o-ring which you can remove just by poking it in there and you can slide it off just like that and then you get your new one and push it back on then get it all the way back into position and just make sure sure that there’s no damage to it and then quite simply screw it all the way back down through the thread to the bottom. Just making sure the last few turns do nice and slowly so not to damage the seal and just make sure you’re getting a firm tightness on there to seal it up and so this does not need any more bleeding once you filled it all the way to the top with diesel.
So now, you should be able to just start your engine and carry on as normal. This is a very good filter to have on your boat from the from ease of use and if you’re out in a heavy chop it’s the simplest and easiest one to change so it’s it’s often recommended by us so thank you for that that is the Racor fuel filter change. Thank you
Click on image to view video
Recherche
Vidéos de support
Produits connexes
Racor 500FG10MTC (Metric Ports) Fuel Water Separator
Racor 500FG2430MTC (with 24V Heater, Metric ports) Fuel Water Separator
Séparateur d'eau et de carburant Racor 500FG2-500FG
Racor 500FG242 (with 24V Heater) Fuel Water Separator
Racor 500FG2430 (with 24V Heater) Fuel Water Separator
Racor 500FG30 Fuel Water Separator
Séparateur d'eau et de carburant Racor 500FG10-500FG
Kit bol Racor RK1530101 500FGM
Kit bol Racor RK15405 500FG
Racor RK1544002 Chauffage traversant 500FG-24V
Kit de vidange Racor RK30476 500FG
Kit de bagues de cuvette Racor RK15035 500FG
Kit couvercle Racor RK15078 500FG
Kit de vidange Racor RK11780 500FG